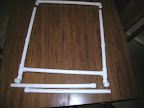
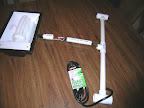
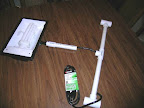
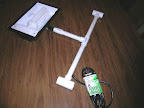
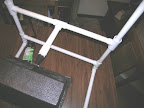
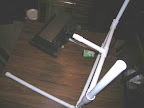
Since my fall growing season pretty much got blown out of the water by recent catastrophic weather events, I decided to look ahead towards spring and start making preparations to be ahead of the game for once. To that end, I took the high intensity compact fluorescent light fixture I bought (last year) and constructed a stand for it. Now it can be put to use starting all my spring seedlings. A quick trip to the Home Improvement Center was all it took…
For this project, you will need:
(1) Lights of America model 9266 65-watt Compact Fluorescent Floodlight
(15) feet of 3/4″ Schedule 40 PVC pipe
(4) 3/4″ elbows
(2) 3/4″ tees
(2) 3/4″ caps
(1) 3/4″ slip x slip coupler
(1) 1/2″ FPT x 3/4″ slip bushing
(2) 1″ x 1″ x 3/4″ tees
(2) 1″ lengths of 1″ Schedule 40 PVC pipe
(1) 8-foot replacement power cord with plug
PVC pipe cutter
drill with 3/8″ bit
file or sandpaper
Some stores sell 5-foot cut lengths of pipe in addition to the stock 10-foot lengths. If you have this option, all the pieces necessary can be cut from these two lengths. The hardest part may be obtaining only two inches of the 1″ pipe.
Cut the 3/4″ pipe into six pieces 22″ long each, two pieces 10-1/4″ long, two pieces 2″ long, and one piece 6″ long. From the pieces of 1″ PVC pipe, remove approximately 1/4 of the circumference of each using the PVC cutter or a hacksaw, creating two “C” clips.
Approximately 1-1/2″ from the end of one of the 10-1/4″ pieces, drill a 3/8″ hole. File smooth any rough edges, inside and out. IMPORTANT: Use NO PVC cement until you are satisfied with the fit and orientation of the entire finished assembly. Cement is optional as friction fit alone should sufficiently allow the assembly to remain rigid, and will allow disassembly for storage or later modification as you see fit.
For the main frame, assemble a rectangle using four of the 22″ lengths of pipe, two of the 3/4″ elbows, and two of the 3/4″ tees, with the elbows at the top and the tees at the bottom, oriented so the remaining openings are facing downward. Into each of the remaining tee openings, insert the 2″ lengths of 3/4″ pipe which have already been inserted into the last two 3/4″ elbows. Place the 3/4″ caps on one end of each of the remaining 22″ pipes, and insert their opposite ends into the open elbows, orienting them perpendicularly to the rectangular frame.
Next, assemble the lightbar. Insert the 1/2″ FPT x 3/4″ bushing into the 3/4″ coupler. Place a 1″ x 1″ x 3/4″ tee on one end of each of the 10-1/4″ pipes, nearest the hole on the drilled one. Insert the wires of the light fixture into the threaded bushing end of the bushing/connector assembly. Before screwing the fixture stem into the bushing, wrap it with a few turns of Teflon tape. Thread the pigtail end of the replacement power cord through the 3/8″ hole in the one 10-1/4″ pipe so it exits the pipe at the end furthest from the hole. Then thread it next in through one side of the “top” of the remaining 3/4″ tee, and out the adjacent “bottom” side of the tee. Continue threading it through the 6″ pipe. Use wire nuts supplied with the fixture to connect the wires, white to white and black to black. If the power cord has a green ground wire, it can be left unconnected, but do not allow it to contact either the white or black wire connections. Fold the wires and connectors so that they may be inserted into the 6″ pipe. Remove slack in the wiring by gently pulling the power cord back throught the drilled hole somewhat as you assemble the bushing/connector, the 6″ pipe, and the 3/4″ tee. Insert the other 10-1/4″ pipe and tee into the remaining 3/4″ tee opening.
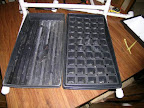
Temporarily remove the top bar and elbows of the rectangular frame. Slide the 1″ PVC “C” clips over each of the 3/4″ uprights, positioning them each about halfway down each pipe. Now, positioning the 1″ x”1″ x 3/4″ elbows on either end of the lightbar assembly vertically, slide the lightbar onto the uprights, allowing it to rest on the “C” clips which will slide into the lower openings of the lightbar tees somewhat. The clips will provide a means of height adjustment for different stages of plant growth. Two standard 20″ propagation trays fit comfortably between the legs with the lamp centered above them.
Total cost, not including the $35 light fixture, about $15.
ADDENDUM: While disassembling and reassembling the light stand to photograph it for this article, I subsequently found the Lights of America fixture would no longer light up. After some internet searching about the unit and the company, I found that consumer research determined that the [proprietary] LOA lamps typically fall far short of their rated life and output, and that the fixture itself uses a cheap coil-and-capacitor electronic ballast. Bottom line is my light unit, even though technically brand new, is out of warranty and, after about 5 minutes’ use, is now a total piece of trash. The light stand, however, may still be of use. I’ll have to see what other light unit I can find to complete it.
