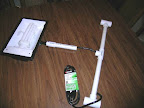
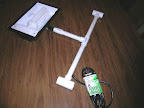
Let’s Build A Light Stand


Since my fall growing season pretty much got blown out of the water by recent catastrophic weather events, I decided to look ahead towards spring and start making preparations to be ahead of the game for once. To that end, I took the high intensity compact fluorescent light fixture I bought (last year) and constructed a stand for it. Now it can be put to use starting all my spring seedlings. A quick trip to the Home Improvement Center was all it took…

For this project, you will need:

(1) Lights of America model 9266 65-watt Compact Fluorescent Floodlight
(15) feet of 3/4″ Schedule 40 PVC pipe
(4) 3/4″ elbows
(2) 3/4″ tees
(2) 3/4″ caps
(1) 3/4″ slip x slip coupler
(1) 1/2″ FPT x 3/4″ slip bushing
(2) 1″ x 1″ x 3/4″ tees
(2) 1″ lengths of 1″ Schedule 40 PVC pipe
(1) 8-foot replacement power cord with plug
PVC pipe cutter
drill with 3/8″ bit
file or sandpaper

Some stores sell 5-foot cut lengths of pipe in addition to the stock 10-foot lengths. If you have this option, all the pieces necessary can be cut from these two lengths. The hardest part may be obtaining only two inches of the 1″ pipe.

Cut the 3/4″ pipe into six pieces 22″ long each, two pieces 10-1/4″ long, two pieces 2″ long, and one piece 6″ long. From the pieces of 1″ PVC pipe, remove approximately 1/4 of the circumference of each using the PVC cutter or a hacksaw, creating two “C” clips.

Approximately 1-1/2″ from the end of one of the 10-1/4″ pieces, drill a 3/8″ hole. File smooth any rough edges, inside and out. IMPORTANT: Use NO PVC cement until you are satisfied with the fit and orientation of the entire finished assembly. Cement is optional as friction fit alone should sufficiently allow the assembly to remain rigid, and will allow disassembly for storage or later modification as you see fit.

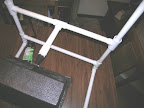
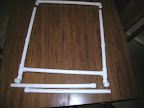
For the main frame, assemble a rectangle using four of the 22″ lengths of pipe, two of the 3/4″ elbows, and two of the 3/4″ tees, with the elbows at the top and the tees at the bottom, oriented so the remaining openings are facing downward. Into each of the remaining tee openings, insert the 2″ lengths of 3/4″ pipe which have already been inserted into the last two 3/4″ elbows. Place the 3/4″ caps on one end of each of the remaining 22″ pipes, and insert their opposite ends into the open elbows, orienting them perpendicularly to the rectangular frame.

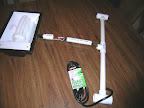
Next, assemble the lightbar. Insert the 1/2″ FPT x 3/4″ bushing into the 3/4″ coupler. Place a 1″ x 1″ x 3/4″ tee on one end of each of the 10-1/4″ pipes, nearest the hole on the drilled one. Insert the wires of the light fixture into the threaded bushing end of the bushing/connector assembly. Before screwing the fixture stem into the bushing, wrap it with a few turns of Teflon tape. Thread the pigtail end of the replacement power cord through the 3/8″ hole in the one 10-1/4″ pipe so it exits the pipe at the end furthest from the hole. Then thread it next in through one side of the “top” of the remaining 3/4″ tee, and out the adjacent “bottom” side of the tee. Continue threading it through the 6″ pipe. Use wire nuts supplied with the fixture to connect the wires, white to white and black to black. If the power cord has a green ground wire, it can be left unconnected, but do not allow it to contact either the white or black wire connections. Fold the wires and connectors so that they may be inserted into the 6″ pipe. Remove slack in the wiring by gently pulling the power cord back throught the drilled hole somewhat as you assemble the bushing/connector, the 6″ pipe, and the 3/4″ tee. Insert the other 10-1/4″ pipe and tee into the remaining 3/4″ tee opening.

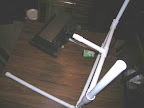
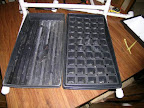
Temporarily remove the top bar and elbows of the rectangular frame. Slide the 1″ PVC “C” clips over each of the 3/4″ uprights, positioning them each about halfway down each pipe. Now, positioning the 1″ x”1″ x 3/4″ elbows on either end of the lightbar assembly vertically, slide the lightbar onto the uprights, allowing it to rest on the “C” clips which will slide into the lower openings of the lightbar tees somewhat. The clips will provide a means of height adjustment for different stages of plant growth. Two standard 20″ propagation trays fit comfortably between the legs with the lamp centered above them.

Total cost, not including the $35 light fixture, about $15.

ADDENDUM: While disassembling and reassembling the light stand to photograph it for this article, I subsequently found the Lights of America fixture would no longer light up. After some internet searching about the unit and the company, I found that consumer research determined that the [proprietary] LOA lamps typically fall far short of their rated life and output, and that the fixture itself uses a cheap coil-and-capacitor electronic ballast. Bottom line is my light unit, even though technically brand new, is out of warranty and, after about 5 minutes’ use, is now a total piece of trash. The light stand, however, may still be of use. I’ll have to see what other light unit I can find to complete it.
Dscn0206a.jpgDscn0207a.jpgDscn0208a.jpgDscn0209a.jpgDscn0210a.jpgDscn0211a.jpgDscn0212a.jpg

Quick & Easy: Ground Beef & Cabbage Casserole

Posted by August 25, 2005

Another one pot, under-an-hour recipe– low carb, yet filling. Prepare as directed, or spice it up at your discretion.

Quick & Easy: Ground Beef & Cabbage Casserole

1 or 1.5 lb. lean ground beef
1 small cabbage (2 lb.)
1 15.8 oz. can petite diced tomatoes
1/4 C. dried minced onion
2 cloves fresh garlic, minced
8 oz. water
fresh ground pepper
1/2 t. salt

Core cabbage, slice and chop into 1″ square pieces. Brown ground beef in large pot, seasoning with fresh ground pepper. When beef is browned, drain if necessary, and add diced tomatoes, onion, garlic, and water. Bring to just boiling. Reduced heat to medium and add cabbage. Cook until cabbage is tender, stirring frequently. Makes about 8 servings.

Note: Optionally, 1/8 tsp. of caraway seed, ground between the fingers before adding, brings an interesting flavor dimension to the cabbage.

Making A Composter

Posted by July 23, 2005

If you do a lot of gardening, you know how valuable compost can be towards enriching the soil and improving plants. Rich in organic material, compost acts as a soil conditioner and nutrient source, and also contains beneficial microbes that assist in making those nutrients
more readily available to your plants.

Commercially-available compost making units seemed rather costly to me, so I decided to build a one out of an old trash can. Holes had been worn in the bottom of the can over nearly two decades of use, but I figured it could continue to be of service in a different way.

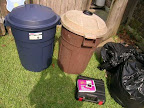
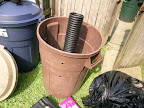
All the necessary materials: One old 32-gallon RubberMaid trash can with lid, and a length of 4″ diameter corrugated, perforated plastic drainage pipe (available from most home improvement centers).

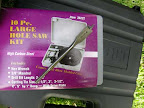
Necessary tools for the project include a cordless drill, a 4″ hole saw, a 5/8″ wood bit (the kind with points at the outer edges), and a pair of heavy kitchen shears.

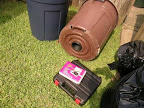
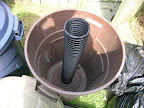
A length of the pipe was cut 33″ long, to the next nearest widest corrugation at each end. Rough edges were cleaned up, but the kitchen shears do a reasonably neat job, anyway. The flanged ends were cut perpendicularly 1/2″ deep at the 12, 3, 6, and 9 o’clock positions. 4″
holes were sawed in the bottom center of the can and center of the lid– it was easiest to center the holes by drilling from the inside surfaces in both cases. Since the pipe is 4″ in diameter at the narrowest point of the corrugations, these were necessary to pass the
pipe ends through the 4″ holes, but then “lock” the pipe in place. This task was more difficult at the bottom end, as the can is thicker and less pliable than the lid, but the tightest fit possible is preferred.

5/8″ holes were then drilled in a regular fashion all around the can– 24 all total. 4 additional holes were drilled in the lid as well.

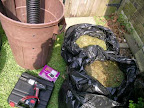
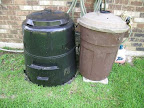
Conveniently, the yard man chose not to use the mulching mower this week. Lots of starter grass clippings, leaves, pine needles. Kitchen waste and shredded paper will be added also.

Total project cost: an amazingly low $3.48! Actually, only $1.16, as there is enough pipe left over from the 10 ft. length to make two more. If you wanted to make one out of a brand new can: $13.08.

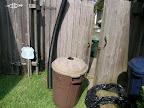
Funny part of the story: As I was completing the project, my neighbor came out to wash his car and asked what I was doing. When I told him I was making a composter, he said he had one he didn’t use and I was welcome to have it– for free. Turns out it’s an Earth Machine,
which the local municipality gave out free to residents several years ago in an effort to reduce landfill waste. Seems they normally sell for about $60-70. They appear to be nothing more, really, than an eye-pleasing way to make a compost pile, but include venting, an
adjustable-vented lid, and a door to remove compost. It may well not work any better than my can project, but, for free, I’ll give both a try. I can see already, however, that my design has one advantage– all I will need do to give the pile a stir with mine is lay it on its side
and roll it around the yard a bit. Between the lid’s built-in clips and the chimney flange holding it, the lid should, hopefully, stay firmly in place. The good news is that the compost that was left in the bottom of the Earth Machine will make a fine inoculant for both compost piles.

Dscn0052a.jpgDscn0053a.jpgDscn0054a.jpgDscn0055a.jpgDscn0056a.jpgDscn0057a.jpgDscn0058a.jpgDscn0059a.jpg

Quick & Easy: Southwest Chicken Pasta Salad

Posted by June 7, 2005

This is a flavorful rotini pasta salad with grilled chicken, almonds, red bell pepper, black olives and green onions, all in a chipotle mayonnaise dressing. Prepared in as little as twenty minutes.

Southwest Chicken Pasta Salad

10 oz. organic whole wheat rotini pasta (or 16 oz.)
8 oz. grilled chicken tenders** (12 oz. if using 16 oz. pasta)
1/4 C. red bell pepper (1/2 C. if using 16 oz. pasta)
1/4 C. sliced black olives (1/2 C. if using 16 oz. pasta)
2 green onions (4 if using 16 oz. pasta)
1/4 C. slivered almonds (1/3 C. if using 16 oz. pasta)

1 C. chipotle mayonnaise*
OR 1/2 cup chipotle mayo plus 1/2 cup regular mayo
OR 1/2 cup mayo plus 1/2 cup sour cream plus 1 T. Sriracha Chile sauce.

Cook pasta in salted water until tender. Drain in collander and set aside to cool.

Cube chicken tenders into 3/4″ cubes. Dice approx. 1/3 a red bell pepper to make 1/4 cup. Coarsely chop black olives, approx. half a 2.25 oz. can, to make 1/4 cup. Chop green onions, tops and all, into 1/4″ slices.

Place cooled pasta and all other ingredients in large bowl. Add mayonnaise, mixing to coat thoroughly. Optionally use a mixture of half chipotle mayo and half regular mayo. If you like chipotle, and a little more spice, go with 100% chipotle mayo. Makes 5-6 servings (6-8 if using 16 oz. pasta).

For an extra Southwest touch, add 2 t. chopped fresh cilantro (2 T. if using 16 oz. pasta).

*Chipotle Mayo

1 C. mayonnaise
2 chipotle peppers in adobo sauce (3 if small)
1 T. adobo sauce
2 t. worcestershire sauce

Cut open chipotles and remove stems and seeds. Grind to a paste with a chopper or mortar and pestle. Combine all ingredients thoroughly. Improves after refrigeration time. Canned chipotle peppers (smoked jalapeños) in adobo sauce can be found in the ethnic foods section of most groceries.

**Chicken Tenders Preparation

Prep fresh chicken tenders by using kitchen shears to remove most of small tendon, if attached. Place in a brine composed of 1/4 cup Diamond Crystal kosher salt and one quart cold tap water and refrigerate for 6-8 hours (do this in the a.m, and they will be ready to cook by dinner time). Drain and rinse tenders in cool water and pat dry with paper towels. Season as desired. On a pre-heated, lightly-oiled George Foreman grill, cook for four minutes, or until meat temp reaches 160°. Use in salad recipe above while still warm or refrigerate for use later.

5-Gallon Bucket Tomato Planters Revisited

Posted by May 22, 2005

Now that all danger of frost has passed– 5 weeks ago in fact– it’s time to plant some tomatoes. The bucket containers from last year got a thorough cleaning and disinfecting and are ready to go…

The bucket containers sat out on the patio all winter, and they ended up turning themselves into four foot potted night-blooming jasmines.

For those unfamiliar, night-blooming jasmine is really great in the summer. Throw open the patio door after dark and their fragrance fills the house, and the neighborhood as well. They grow ten feet tall, and propagate themselves at the drop of a hat. Don’t worry about winter freezes with this stuff– you can’t kill it, and it will be back with a vengeance next year.

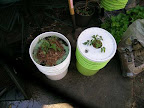
Anyway, after extracting the jasmine from a couple of the bucket containers, and getting them scrubbed out and disinfected with a spray bottle full of hydrogen peroxide, it was time to plant.

This year, after the dismal results last year with creole tomatoes, I went an entirely different direction. I chose the Celebrity hybrid for its disease, drought, and heat resistance. This variety is also a determinate, which means it will grow to a fixed height– about 3 feet– and stop. It also means it will set its fruit almost all at once. Fortunately, it is quick to maturity, so I should have something to harvest within about 60 days.

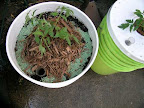
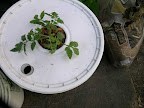
I buried about 50 percent of the plants in the soil– this will increase rooting, and help the plants to develop strong stalks.

I also added one more thing over years past, which was to place a large handful of cypress mulch around the base of the plant. This should help preserve moisture even further than just the bucket lid, and will keep soil-borne pathogens off the lower leaves of the plant. Once these starts get about a foot and a half tall, I have some cages to support what I hope will be lots of tomatoes.

Dscn0031a.jpgDscn0032a.jpgDscn0033a.jpgDscn0049a.jpg

Quick & Easy: Turkey & Eggplant Casserole

Posted by May 9, 2005

This is a great comfort food dish that can be prepared and ready to serve in under an hour, in one pot on the stovetop. It’s naturally low carb and low fat, too. There’s a bit of spicyness from the Rotel tomatoes, diced chiles, onion and garlic, but it’s all nicely balanced and in no way overwhelming.

Doug’s Turkey & Eggplant Casserole

3/4 to 1 lb. ground turkey (or lean ground beef)
1 med-lg. eggplant
2 10 oz. cans Rotel Milder Diced Tomatoes and Green Chiles, undrained
1/4 C. dried chopped or minced onion
2 cloves fresh garlic, minced
3 T. tomato paste
fresh ground black pepper
1/4 C. whole wheat bread crumbs

1/4 C. kosher salt
4 cups cool tap water

Prepare eggplant by peeling and slicing into 1/2″ thick slices. Chop slices into 1/2″ cubes. To prevent bitterness, soak cubes 15-20 minutes in a brine made up of 4 cups cool tap water into which 1/4 cup of Diamond Crystal Kosher Salt has been dissolved.

Brown ground meat in a large pot, seasoning with fresh ground black pepper. Once meat is browned, drain if necessary. Drain eggplant in collander and rinse with cool tap water. Add tomatoes with chiles, onion and eggplant to pot. Bring to just boiling, and reduce heat to medium-low. Simmer, stirring frequently, until eggplant starts to turn translucent. Add garlic and tomato paste, and continue to stir. When all pieces of eggplant are cooked, add bread crumbs to further thicken mixture.

Yield: About 6 cups.